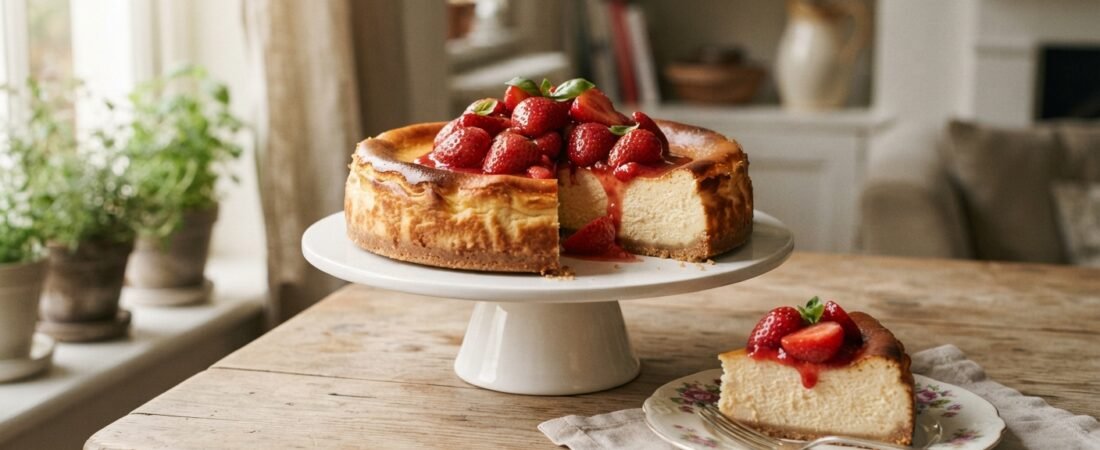
There is nothing quite like the dense, velvety, melt-in-your-mouth experience of an authentic New York-style cheesecake. Standing tall with its signature golden-brown crust and perfectly smooth, crack-free surface, this dessert is the gold standard of indulgence. While it may seem intimidating, the secret lies not in complex techniques, but in patience, temperature control, and a few simple tricks to ensure a flawless, creamy texture. Whether you top it with a vibrant berry compote or savor it in its pure, unadulterated form, this cheesecake is guaranteed to be the star of any table.
Recipe Quick Facts
- Prep time: 30 minutes
- Cook time: 1 hour 35 minutes
- Cooling time: 4 hours (minimum)
- Chilling time: 6 hours (minimum, preferably overnight)
- Servings: 12 to 16 people
Ingredients
For the Graham Cracker Crust:
- 1 1/2 cups (about 150g) graham cracker crumbs (from roughly 10-12 sheets)
- 2 tablespoons (25g) granulated sugar
- 1/3 cup (75g) unsalted butter, melted
For the Cheesecake Filling:
- 4 packages (8 ounces each / 900g total) full-fat cream cheese, softened to room temperature
- 1 1/3 cups (265g) granulated sugar
- 1 teaspoon vanilla extract
- 1/2 cup (120g) full-fat sour cream, at room temperature
- 4 large eggs, at room temperature
Step-by-Step Instructions
Part 1: Prepare the Crust and Pan
- Preheat and Prep: Preheat your oven to 350°F (175°C). Wrap the outside of a 9-inch springform pan completely in a double layer of heavy-duty aluminum foil, ensuring it comes all the way up the sides. This is crucial for the water bath later.
- Make the Crust: In a medium bowl, combine the graham cracker crumbs, 2 tablespoons of sugar, and melted butter. Stir until the crumbs are evenly moistened.
- Press and Pre-bake: Pour the crumb mixture into the prepared springform pan and use the bottom of a flat glass or measuring cup to press it firmly and evenly into the bottom and about 1 inch up the sides of the pan. Bake for 10 minutes. Let it cool on a wire rack while you prepare the filling. Reduce the oven temperature to 325°F (165°C).
Part 2: Make the Filling
- Cream the Cheese: In a large mixing bowl (using a stand mixer fitted with the paddle attachment or a hand mixer), beat the softened cream cheese on medium-low speed until completely smooth and creamy, scraping down the sides and bottom of the bowl as needed (about 2-3 minutes). Make sure there are no lumps.
- Add Sugar and Flavor: With the mixer on low, gradually add the 1 1/3 cups of sugar and mix until incorporated. Add the vanilla extract and sour cream, mixing just until combined. Be careful not to over-aerate the batter, as this can cause cracks.
- Incorporate the Eggs: Add the room-temperature eggs one at a time, mixing on the lowest speed just until the yellow yolk disappears into the batter after each addition. Stop mixing immediately once the last egg is incorporated. Use a spatula to give the batter a final fold, ensuring everything is mixed but not overworked.
Part 3: The Water Bath and Baking
- Assemble: Pour the cheesecake batter over the cooled crust and spread it into an even layer. Place the foil-wrapped springform pan into a large roasting pan.
- Create the Bath: Carefully pour boiling water into the roasting pan until it reaches about halfway up the sides of the cheesecake pan.
- Bake: Carefully transfer the entire setup to the preheated 325°F (165°C) oven. Bake for 1 hour to 1 hour and 20 minutes. The cheesecake is done when the edges are set and slightly puffed, but the center 2-3 inches still has a slight wobble (like Jell-O) when you gently jiggle the pan.
Part 4: The Slow Cool (The Secret to No Cracks)
- Turn Off the Oven: Turn off the oven but leave the cheesecake inside. Prop the oven door open slightly (a wooden spoon works well here).
- Cool Down: Allow the cheesecake to cool gradually in the cooling oven for at least 1 hour. This slow temperature drop prevents the cheesecake from contracting too quickly and cracking.
- Final Cool: Remove the cheesecake from the water bath and the roasting pan. Place it on a wire rack and let it continue to cool at room temperature until completely cool to the touch.
Part 5: Chill
- Refrigerate: Once fully cooled, cover the pan loosely with plastic wrap and transfer it to the refrigerator. Chill for at least 6 hours, or ideally overnight, until completely firm and cold.
- Serve: Once chilled, carefully run a thin knife around the edge of the cheesecake before releasing the springform pan’s side latch. Slice with a sharp knife (dipping the knife in hot water and wiping it dry between cuts helps get clean slices) and serve plain or with your favorite toppings.
Chef’s Useful Tips
- Temperature is Everything: Ensure your cream cheese, sour cream, and eggs are truly at room temperature. Cold ingredients will not emulsify properly, leading to a lumpy batter and a grainy texture.
- Don’t Overmix: Overmixing the batter incorporates too much air, which expands during baking and causes cracks as it cools. Mix on low speed and stop as soon as the ingredients are combined.
- The Water Bath (Bain-Marie) is Non-Negotiable: This provides even, gentle heat and adds moisture to the oven, preventing the edges from overcooking before the center is set and ensuring the classic creamy New York texture.
- Patience While Cooling: The slow cooling process in the turned-off oven is your best insurance against a cracked surface. Rushing this step is the most common cause of failure.
Nutritional Information (Per Serving, 1 of 16 slices)
- Calories: 480 kcal
- Protein: 8g
- Carbohydrates: 38g
- Dietary Fiber: 1g
- Sugars: 32g
- Total Fat: 34g
- Saturated Fat: 20g
- Cholesterol: 145mg
- Sodium: 320mg
Conclusion
Making a perfect New York Cheesecake is a test of patience, but the reward is a slice of pure, unadulterated luxury. By following these steps—especially ensuring room-temperature ingredients, using a water bath, and allowing for a slow, gradual cool-down—you will achieve that iconic dense, creamy texture and flawless appearance right at home. Slice it up, share it with loved ones, and enjoy one of the world’s greatest dessert experiences.